Accelerate Your Named Entity Recognition Tasks with LLM-Powered Pre-Annotations

Sheree Zhang
Sr. Product Manager
Sr. Product Manager
In this post, we’ll guide you through the process of using Prompts in Label Studio Enterprise to pre-annotate data for Named Entity Recognition (NER) tasks.
NER is a core natural language processing (NLP) task that involves identifying and classifying entities such as people, organizations, locations, dates, and more within text. It’s particularly useful in scenarios like information extraction from legal documents, customer support ticket triaging, or analyzing financial reports where identifying key entities quickly can drastically improve the efficiency and accuracy of downstream tasks.
Whether you’re working on a large dataset or just starting a project, Prompts helps accelerate your labeling efforts by leveraging powerful large language models (LLMs). You can also evaluate how well the model performs on your data before applying it at scale, labeling your data in a fraction of the time it would take to do it manually.
And unlike just prompting an LLM to do the labeling, when you manage this process through Label Studio you’ll be able to:
Let’s get started!
Label Studio users may already be familiar with the ML Backend, where you can bring your own model to help with pre-labeling. But now, with Prompts, you can pre-annotate your data using LLMs directly within Label Studio. This means faster labeling for complex tasks like NER and the ability to quickly test how well your LLM-generated annotations align with ground truth data before applying them across your project data.
You can get a quick video overview of how this works in practice in this short video.
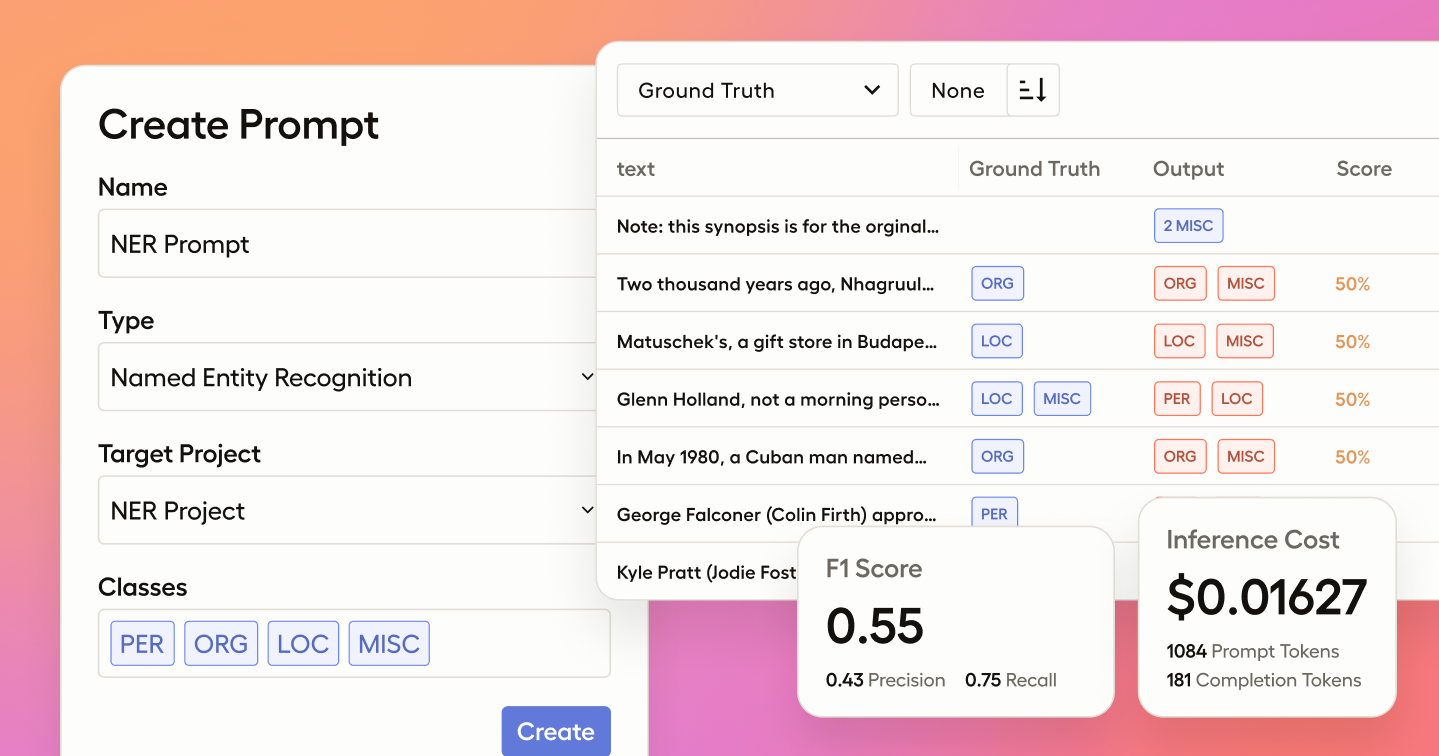
When you create a new Prompt in Label Studio, you'll be asked to select the type of task you'd like to use it for. In this case, we’ll select NER. The system will then list all the projects within your Label Studio instance that match the requirements for the chosen problem type.

Once you’ve chosen NER, you can link your Prompt to a specific Project. For this tutorial, we’ll select an NER Demo Project. By doing this, Label Studio will automatically populate the classes (such as “Person,” “Location,” or “Organization”) from your project’s labeling configuration, and the data you’ll be working with will be imported directly into the prompt interface.

Now that your Prompt is set up, it’s time to select the base model you’d like to use. Label Studio supports a range of models, including OpenAI, Azure OpenAI, and custom LLMs. Simply provide your API credentials, and you’re ready to go.
Next, select the Project subset you’ll be using to test the Prompt. For this tutorial, we’ll be using our ground truth data—this is a sample of data from my Project that’s already been labeled and validated as correct, which will allow us to measure how well the LLM performs against human annotations. You can learn how to create a ground truth dataset in Label Studio here.
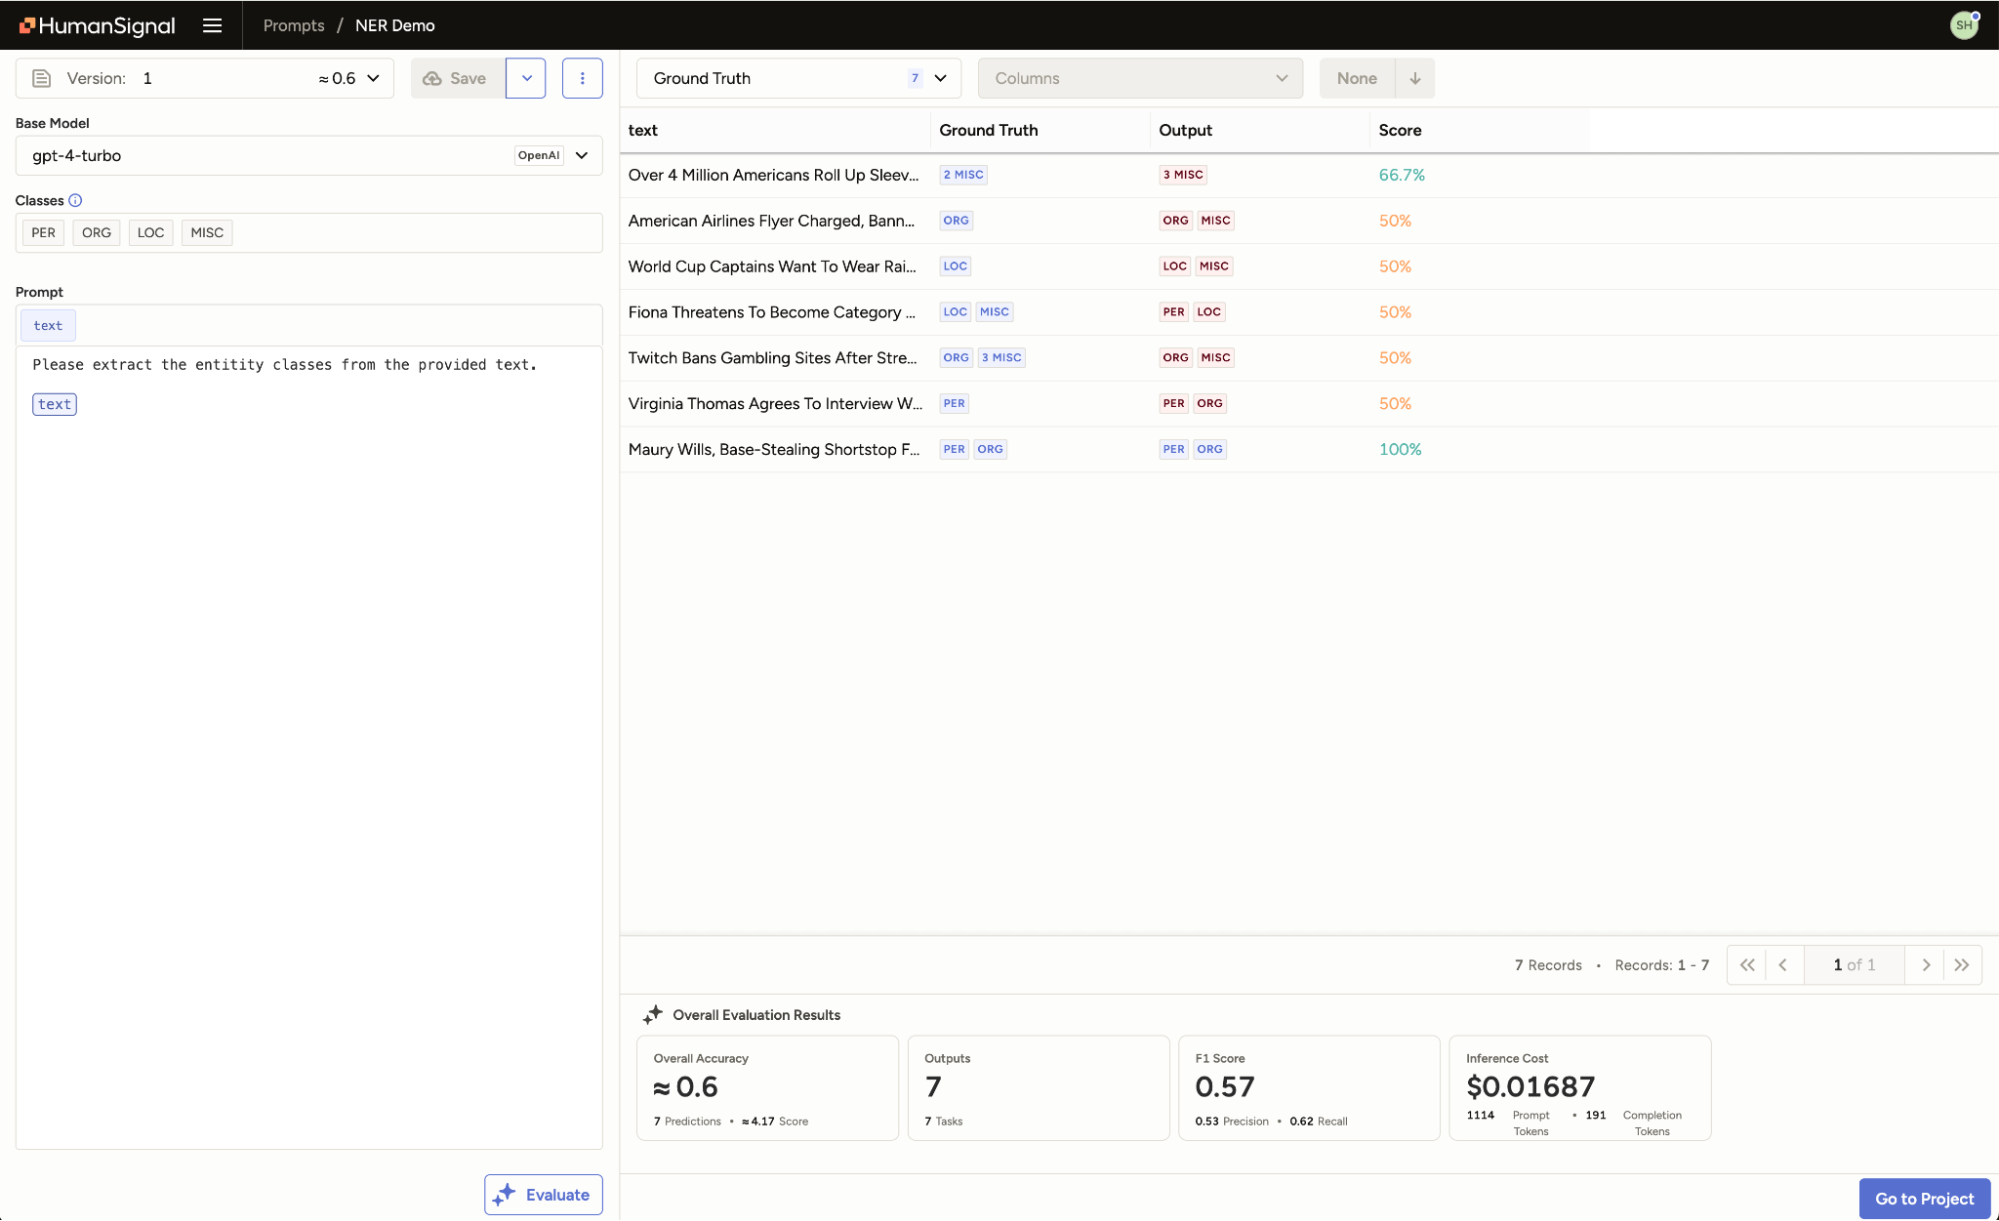
With the base model and task subset ready, you can now write and evaluate your Prompt. Save your Prompt, then click Evaluate, and the system will run the LLM against the selected tasks. Since we’ve chosen a ground truth set, you’ll immediately see metrics showing how the predictions compare to your ground truth labels.

Once the evaluation is complete, you can dive into the results. For each task, you’ll see the side-by-side comparison of the LLM’s predicted entities and your ground truth data. This makes it easy to see how well the Prompt is performing and identify areas where it may need adjustments.

Prediction

Ground truth
You can go back and refine your Prompt as needed. Each time you make a change, you can save the new version and compare it to previous iterations, making it simple to track improvements.

Once you’re satisfied with the performance of your Prompts, you can easily scale up and generate pre-annotations for all tasks in your Project, then convert these pre-annotations to annotations when ready.

Once you’ve annotated the tasks in your Project with Prompts, you can now use Label Studio’s built in human-in-the-loop workflows to monitor label quality and provide human review for tricky or low-confidence items.
With Prompts, leveraging LLMs for Named Entity Recognition tasks in Label Studio is seamless. Whether you’re fine-tuning your model for better performance or automating tedious labeling tasks, Prompts helps you save time while maintaining high-quality annotations.
Happy Labeling!

Now you can have the speed and flexibility of coding agents with the powerful backend of Label Studio Enterprise.


Turn agent traces into structured human evaluations to uncover quality issues and drive improvements.


Now Label Studio Enterprise has the most flexible and granular metrics to measure agreement and compare agreement across sannotators, models and ground truth.
